This blog has been merged with JoyfullyYoursSusannah.blogspot.com. Please come visit me there! (Don't worry, all the posts have been successfully moved over.)

Saturday, April 14, 2012
Blog consolidation
Hello, friends! For the next week, there will be no posts because I'm consolidating three blogs into one: JoyfullyYoursSusannah.blogspot.com. So please be patient while I move things over from Just Sew Like Me and Kids in Kahoots. Blogposts will be identified as coming from each particular segment, but the more blogs I read, the more I enjoy those that combine all it means to be family and creative at the same time.
Another reason for the hiatus is that I have a craft show one week from today, so I'll be busy getting ready for that. Please join me if you're in the area of north Dallas, TX. Please leave a comment if you need details.
So, browse around all the older posts in case you missed any, and then be prepared for a lot more to come!
Suzi
Tuesday, April 10, 2012
Tuesday Tutorial: Simple, 20 minute skirt
I've used this same technique to make lots of children's skirts, but I've never made a skirt from myself from it! (Actually, if you have large hips —like mine— you'll probably not want to use this tutorial for you. The elastic waist seems to emphasize large hips;( )
Anyway, take a look at a picture of a skirt I made, then skip right over to Grosgrain Fabulous to see the tutorial.
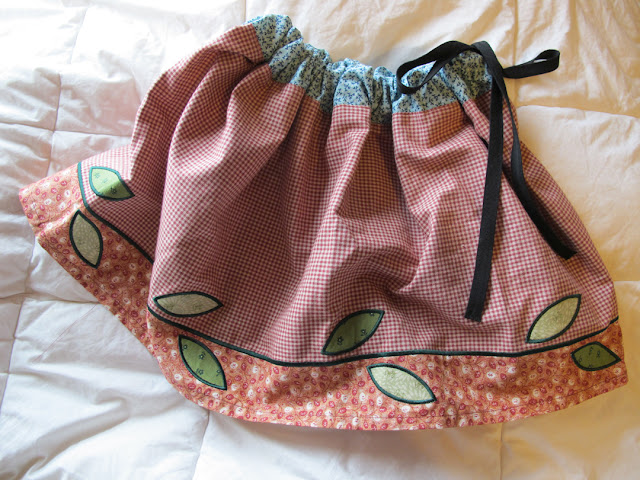
Anyway, take a look at a picture of a skirt I made, then skip right over to Grosgrain Fabulous to see the tutorial.

Monday, April 9, 2012


Thursday, April 5, 2012
Thrifty Thursday: Girl's skirt to child's dress
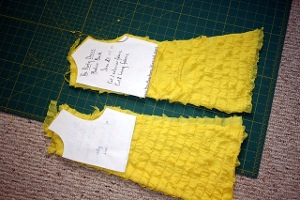
When I saw this little skirt at my local thrift store, I couldn't believe how cute it was, and I immediately knew what I wanted to do with it. And now I want to show you what I did.


 Cut out and ready to sew.
 Sew the shoulders—the only seams I had to sew!
 Make a little rolled hem to finish the armholes and neck and...
 ...there you have it! Loose like this or...


Isn't it just gorgeous? I love the ice-cream layers with the cherries-on-the-top red stripes.

I have a favorite bodice that would work just perfectly for what I wanted to do,
so I folded the skirt in half lengthwise and pinned the bodice to it. I knew I wanted the bodice to end at the first red stripe, so I positioned it where the armholes would be above that.


...with a sash that took me almost as long to make as the dress. Total time involved including the sash, 35 minutes.
Tuesday, April 3, 2012
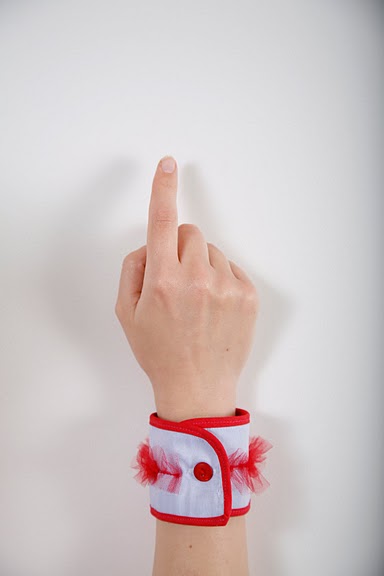
Shirt Cuff Bracelets By: Stefi Luca
Shirt Cuff Bracelets
By: Stefi Luca
- Tun the cuffs of a man's shirt into adorable cuff bracelets with this sewing tutorial from Stefi Luca. If you have refashioned the shirt into a cute dress, you don't need to throw away the cuffs!
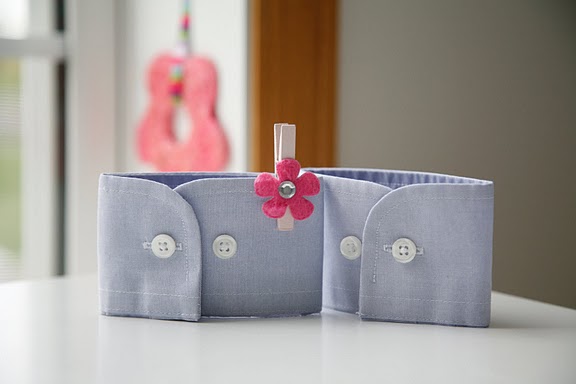
Materials:
- shirt cuffs
- bias tape
- a decorative button
- some ribbon or lace or any other fabric
Instructions:
- Sew the bias tape along the edge of the cuff.
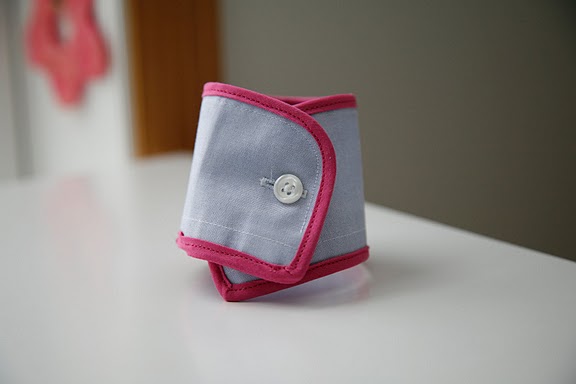
- Remove the existing button and replace it with a decorative one.

- Add a ruffled strip of fabric on the center (ribbon, lace or any other fabric that you like). Here you have a blue and pink cuff braceletor a blue and red cuff bracelet.
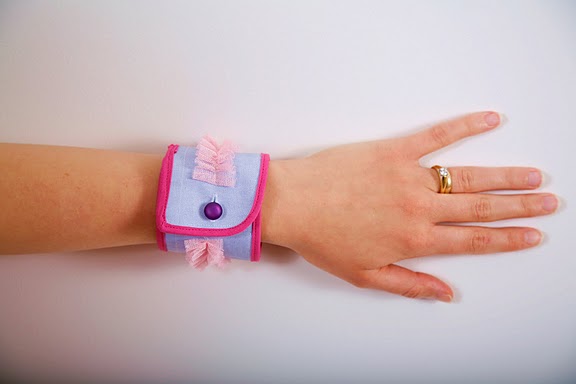
This a very easy sewing project for a beginner and at the same time a fun way to express your fashion sense.

Monday, April 2, 2012
20 Minute Ruffle Dress By: Jessica for Me Sew Crazy
20 Minute Ruffle Dress
By: Jessica for Me Sew Crazy
- The 20 Minute Ruffle Dress from Jessica Gerblick is one of those simple sewing projects for kids that really does take only 20 minutes! The pre-ruffled fabric makes the dress look much more complicated than it is.
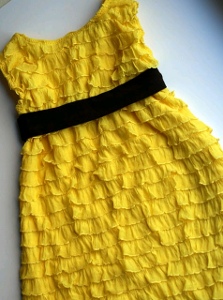
Materials:
- 3/4 yard-1 yard of ruffled fabric
- Sleeveless dress or shirt pattern (or dress to measure against)
- Scrap fabric for belt (optional)
Instructions:
- Laying the bodice pattern pieces down on the fabric, with BOTH of them on the fold, I cut out the top and arced out to my desired length.
- Then with right sides together, I sewed up the side seams and shoulder seams, turned the dress right side out, folding down the raw edge neck line and armholes, and zig zag stiched them inside.
- I didn't have a belt to embellish with, so I used a scrap piece of brown knit fabric I had lying around and simply made a belted tube with it to slip over the dress.
Subscribe to:
Posts (Atom)